Wednesday 23 December 2015

Winter Wonderland Cake

Our Christmas cake this year may be a simple design, but it is one that has utilised a Dymo label maker!

I found the cake decorations at Marks and Spencer and decided a polar scene would be perfect.


My wavy-snow icing was done by rolling out a sheet of fondant icing onto a piece of grease-proof paper. By drawing a circle (using the cake baking tin) on the paper I knew how big the top of the cake was and could make sure the icing was the right size. I then used a pizza wheel cutter to cut a wavy line. I fixed the icing in place with some warmed up apricot jam.


I made the igloo by gluing mini marshmallows to a ball of icing. I used the left over white to make the body of the igloo and a small piece of black for the entrance. The wood-pile are just mint chocolate sticks!


My signpost was made from a small piece of corkscrew with a wooden skewer. The Dymo signs were stuck onto cardboard and then attached to the stick with masking tape.

Monday 21 December 2015

Dewar Tartan Wreath

My homemade festive wreath started with this natural rattan wreath from Hobbycraft

By opting for a natural material one I didn't need to completely cover it. It was a good price if it didn't work out! I also used some florist tape and soft wire I already had.


I collected pieces of foliage from my garden. I found pieces about 30cm long were a perfect as length as some were cut down to make small bundles.


 I used the tape to make small bundles then attached to the wreath base with the wire.


 I left the top section free to add a ribbon - using a piece of Dewar tartan wool to make a bow.


The final wreath in place on our front door. I'm really pleased with how it looks and it took about half an hour to make. 


I'll keep the wreath so I can reuse it next year and come up with something different.
 

Sunday 13 December 2015

Christmas Fairy Wings


Sophie is going to be the Christmas Fairy in the nursery show this year - a big role, as you can imagine. So Sunday morning finds me with some tights, wire hangers and the glue gun - here is how I made her wings:


I used:
green tights
two wire hangers
felt
elastic
tinsel
ribbon
glitter glue

tools:
pliers
needle & thread
glue gun


I started by shaping my hangers, then using pliers, I twisted the handles together.


I covered the know of wires with a square of felt - sewing the tube shut.


 I cut the tights into two and used the bottom section to cover each wing.


 I sewed two lengths of elastic (42cm / 16.5") to make loops and stitched the loops through the tights and felt in place.


I then used the glue gun to attach tinsel to the edge of wings.


I used a metre of thick green ribbon to make a bow in the middle.


Then finished with some green and silver glitter glue.


The Christmas fairy will be ready for the show.


Saturday 5 December 2015

Home Sweet Home


I thought a cross-stitch sampler would make the perfect new home gift for a friend. I used pinterest to find some ideas for the design.


I used a lovely teal green for the text and then orange, gold, fuschia and navy for the details.


Tuesday 1 December 2015

Sunflower Field Quilt


Last week I delivered  my latest quilt to the Mary Ann Evans Hospice in Nuneaton. It was with the support of the Hospice at Home team that Dad was able to spend his last days with us, at home. Without their kindness and professionalism those difficult days could have been so much harder. I wanted to create a quilt that they could use to help their fundraising. I used their sunflower logo as my inspiration.


Each of the 12 sunflowers uses a brown, orange and yellow fabrics. The background 'field' are strips of beautiful greens. 


I've had a lovely email from the Hospice team:

"Just wanted to pass on our thanks for the quilt that you dropped off on Saturday! We LOVE it and it will be great for a prize in 2016, our 25th Anniversary Year! As it quite summery, we have decided that it will be raffled nearer the summer either as a prize at our ball or as part of our Garden Party. We really are very grateful for such a lovely gift that has clearly taken a lot of time and dedication to complete"

So watch this space for an update on how much it raises!


 My helpful assistant was a little short to hold the quilt but did a great job, even though she insisted on being in the shot!


Friday 27 November 2015

Going Green

My wedding dress was made fast and did the job but was not the fairy princess frock I'd hoped for. So I decided to do something about it.


I started with the top and choose olive green dye.


After 1 hour of stirring, a quick wash and dry and my new top was done! I may wear it tonight...


Friday 6 November 2015

Top to Frock

I've been having a clear out and two old H&M jersey tops were heading for the charity bag until I decided they would make good play dresses for the girl.

I started with a dress of Sophie's to - very roughly - check for sizes and measurements. I started with the pink top (as I liked it least!) and forgot to take any photos.

Cracking on the with second I knew what I was doing and whipped it up in about half an hour - slightly cheating by mainly using the over-locker. 


I started by chopping of the section under the arms to create the main skirt section of the dress. Then cut the sleeves off.


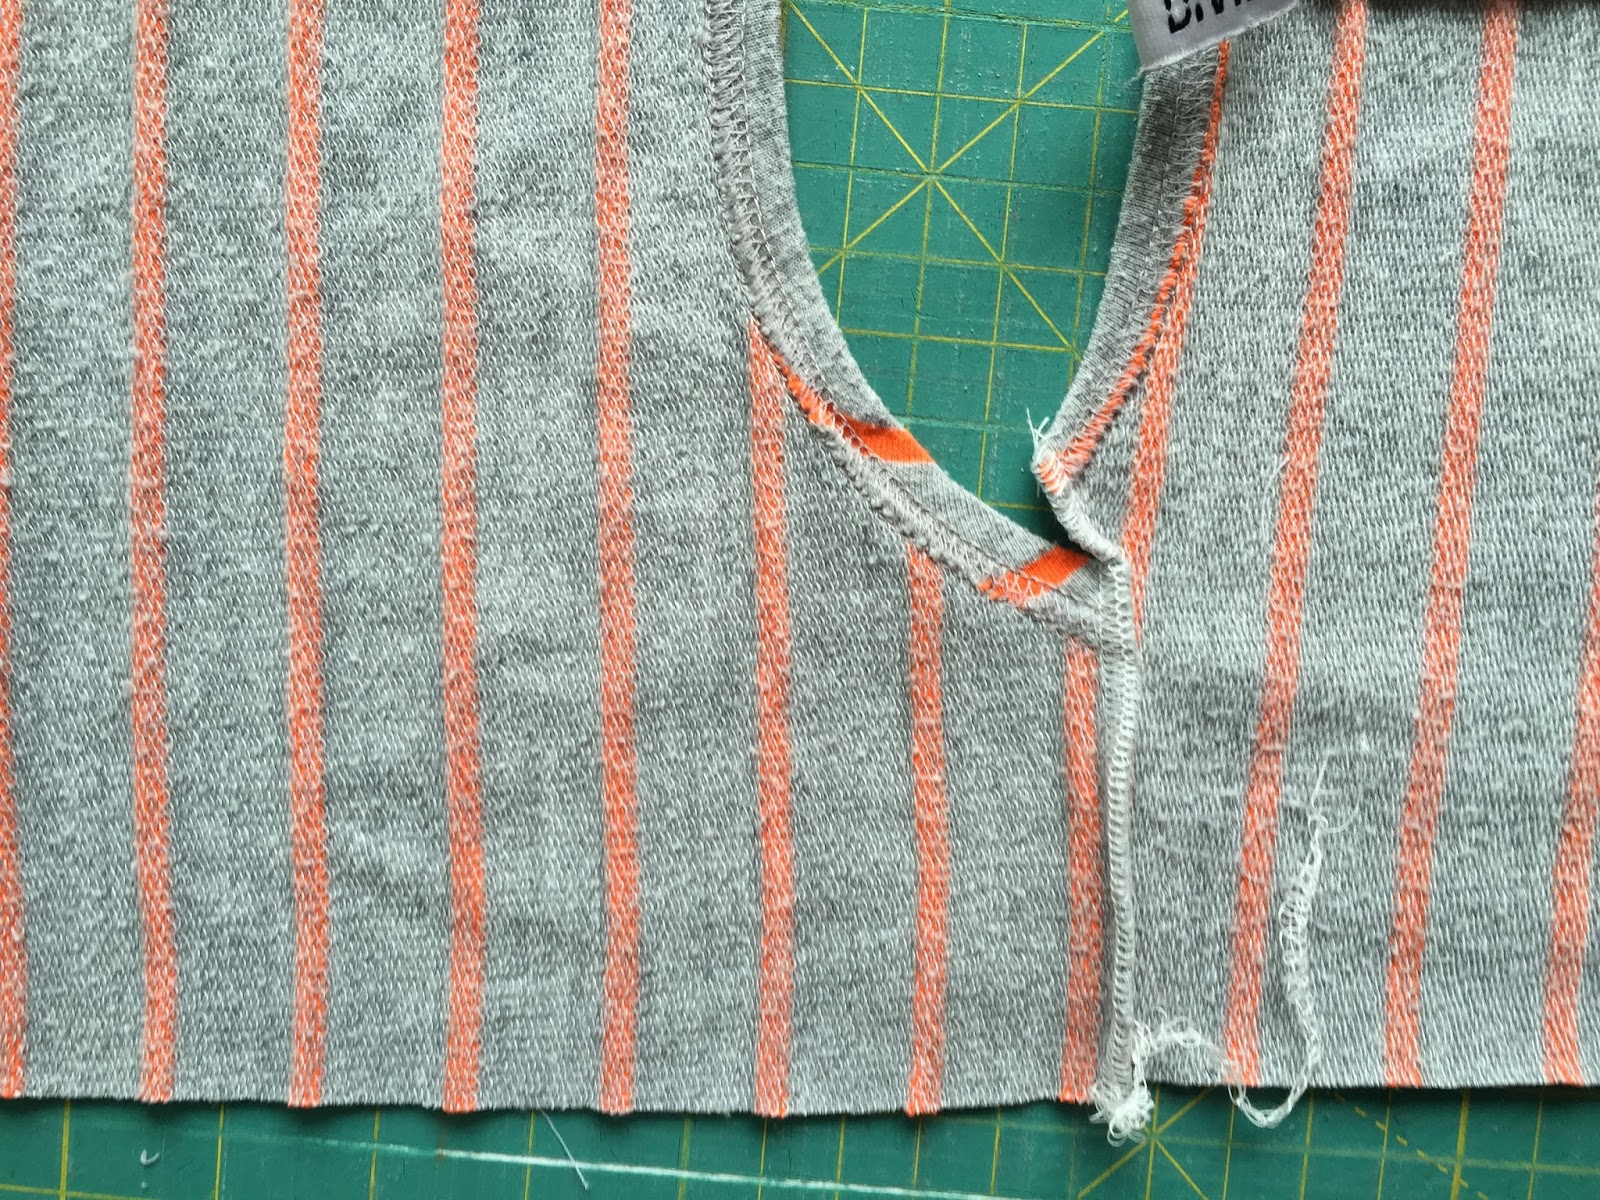
I then cut the bodice to a smaller width (approx 14") and sewed new shoulder seams.


I lay the sleeves together and cut off the about half inch from the original seam.


I then lay the two sleeves on top of each and using the dress I have for measurements I estimated a sleeve width. As my top had rolled sleeves I used scissors to cut through - it wasn't very neat but I knew I would be tidying it up later.


I found the centre of my sleeve and places this on the shoulder seam, pinned then over-locked into place. Repeat for other sleeve.


Then with right sides together I pinned the side seam and sleeve (opening out the rolled hem of the sleeve cuff). Then over-locked - carefully turning the corner under the arm. Repeat on other side. 


With the top section done I sewed two rows of long, basting stitches along the top of the skirt section leaving long tails to pull the gathers. 


Finally with right sides together I pinned the top to the gather skirt, gathering evenly as I went, matching side seams. I sewed on the sewing machine before over-locking to make neat.


With the sleeve cuffs and bottom, dipped hem still in place from the original top - that was it done! Pretty pleased at the refashion.

Monday 2 November 2015

Christmas is coming...

I can tell as I've had a request for a bespoke advent calendar.


The commission was for something traditional with a Nordic feel - I think this combination of green, red and white does this. 


The lucky boy has his name embroidered along the bottom so there is no doubt who the goodies inside each pocket are for!